Setup Guide
Everything you need to get dns-connect running on your machine.
Downloading the app
dns-connect is available for Windows and macOS. Download the version for your operating system below.
Installation
Windows
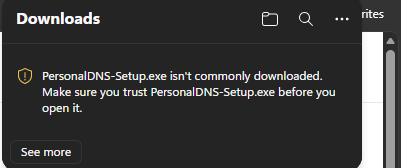
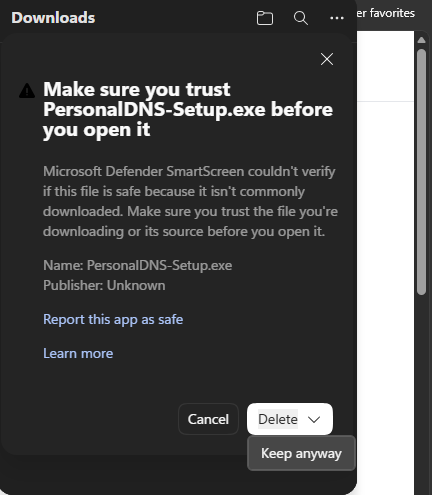
Run the installer
PersonalDNS-Setup.exe. Windows may show a SmartScreen warning — click More info then Run anyway. Follow the setup wizard to complete installation.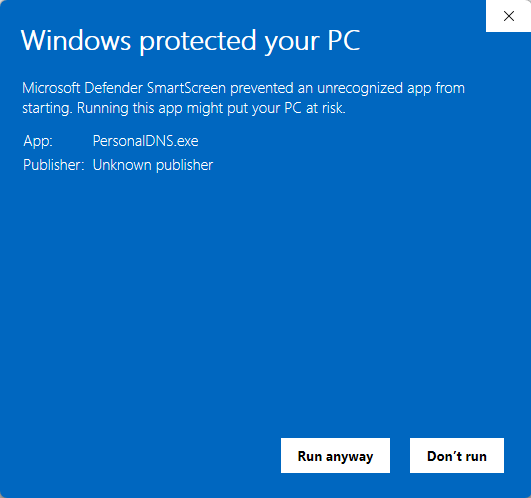
Look for the tray icon

macOS
Unzip the download
PersonalDNS-macos.zip to extract the app.Open the app
PersonalDNS.app and choose Open. Do not double-click — macOS will block an unnotarized app unless you right-click first.Confirm the security prompt
xattr -cr ~/Downloads/PersonalDNS.app then try right-clicking and choosing Open again. This removes the quarantine flag macOS adds to downloaded files.Allow notifications
Creating your account
Go to the signup page
Verify your email
Sign in
Creating a subdomain
Open your dashboard
Enter a subdomain name
home will create home.dns-connect.org. Only letters, numbers, and hyphens are allowed.Click Create subdomain
0.0.0.0 until the desktop app updates it with your real IP.Connecting the app
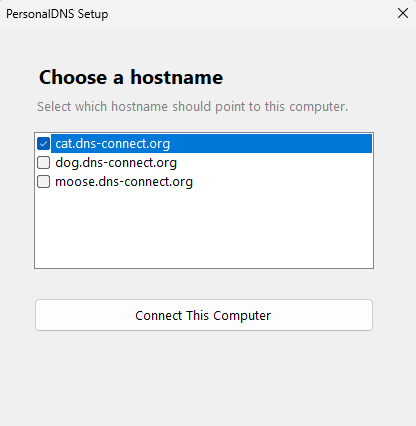
Open the app setup
Sign in to the app
Select your subdomain
Understanding the tray icon
The tray icon gives you a quick view of the app's current state. Right-click it to see the full menu.
Running — IP shown
The app is active and your DNS record is up to date. The menu shows your current public IP address.
Checking IP…
The app is in the middle of an IP check. This is normal and resolves within a few seconds.
Setup required
The app has not been configured yet. Click Open Setup to sign in and select a subdomain.
Authentication failed
Your token has been invalidated — likely because a new token was generated for this subdomain. Right-click the tray icon and select Regenerate Token to restore access.
Router DDNS setup
If your router supports entering a custom DDNS server address, you can use it to update your subdomain without keeping the desktop app running. This is common on routers running open-source firmware such as DD-WRT or OpenWrt.
Generate a DDNS token
Open your router's DDNS settings
Enter the following settings
Save and test
Troubleshooting
The app shows "Authentication failed"
Your session expired and could not be refreshed automatically. Right-click the tray icon, click Fix Authentication, and sign in again.
The app shows "No network connectivity detected"
Your machine has lost its internet connection. The app will resume updating automatically once connectivity is restored.
The app shows "Unable to retrieve public IP address"
Your machine is online but the IP check services are temporarily unreachable. This usually resolves on its own within a few minutes.
My subdomain still shows 0.0.0.0
The app has not completed its first IP update yet. Wait a minute and refresh the dashboard. If it persists, make sure the app is running and configured.
macOS says the app cannot be opened
Right-click the app and choose Open instead of double-clicking. This bypasses the Gatekeeper check for unnotarized apps.
Windows Defender blocked the app
Click More info on the SmartScreen dialog, then Run anyway. The app is open source and safe to run.
I did not receive a verification email
Check your spam or junk folder. If it is not there, go to the verify email page and click Resend verification email.
My subdomain was deleted
Subdomains are automatically released after 12 months without an IP update. Create a new subdomain from your dashboard and reconnect the app.